Storyboard Updates In Depth Tutorial - Part 2
In this tutorial, you will learn how your existing application project can benefit from Bounces dynamic storyboard updates.
Part 2 - Managing View Controller State
Welcome to this second part of This Storyboard Updates In Depth Tutorial! In the first part, you have configured an existing PhotoAlbum app project for dynamic storyboard update, and you have experienced how dynamic storyboard updates allows for instant testing of storyboards edits in the app running on a device or simulator.
If you have gone through all steps of this tutorial first part, you can reuse the current state of your PhotoAlbums Xcode and Bounces projects. Otherwise you can download the PhotoAlbums project (step 1).
Open the PhotoAlbum Xcode and Bounces projects. Now you are ready to take care of the Photo View Controller screen.
Adding live-updates to the Photo View Controller
In its current state, the Photo View Controller is non-interactive and boring, displaying a single photo with lots of empty space around it. For sure we can do better than that!
To work interactively on the Photo View Controller, we will declare it as a dynamic view controller in Bounces. But first, we need to discuss an important aspect of dynamic view controller update: state preservation.
Introducing View Controller State
Until now, you have configured the PhotoAlbum app project for dynamic storyboard update and you have experienced storyboard edits propagation to the target application running on a device or simulator. But we haven't explained yet how the dynamic view controller gets updated. And without entering into implementation details, there is basically one thing you need to know:
During a storyboard update, each dynamic view controller is replaced by a new equivalent view controller created from the new storyboard version.
But a view controller generally has to be configured before being added to the application hierarchy, so it can present the relevant set of data to the user. This configuration is usually done in prepare(for segue:, sender:) or before presenting the view controller by code. Such configuration data defines what we call the View Controller State.
The consequence of replacing a dynamic view controller, during a storyboard update, is that state data must be copied from the current version of a dynamic view controller to its replacing new view controller when an update takes place. Otherwise the replacing view controller won't display anything usefull, or it may even crash the target application.
When updating the Albums List View Controller in the previous section, copying the state was not necessary, because, as navigation root controller, the Albums List View Controller does not have any local state: its role is simply to present a global list of photo albums taken from the application model.
However, other view controllers generally have some local state, indicating the subset of data they present to the user. For example the Photo View Controller displays an individual photo identified by the view controller photoURL property. This photoURL property is sufficient to define the Photo View Controller State, so during a storyboard update, its value must be transferred into the replacing view controller, so that it displays the same photo.

To summarize, when you declare a dynamic view controller in Bounces, you generally have to specify one or more properties of the corresponding ViewController class, and the values of these State Properties will be preserved during storyboard updates.
Configuring the Photo View Controller for dynamic updates
After this long introduction, it's time to make our Photo View Controller dynamic!
Switch to Bounces and click on the Xcode Project button in the project window toolbar. The associated Xcode project target configuration panel appears.
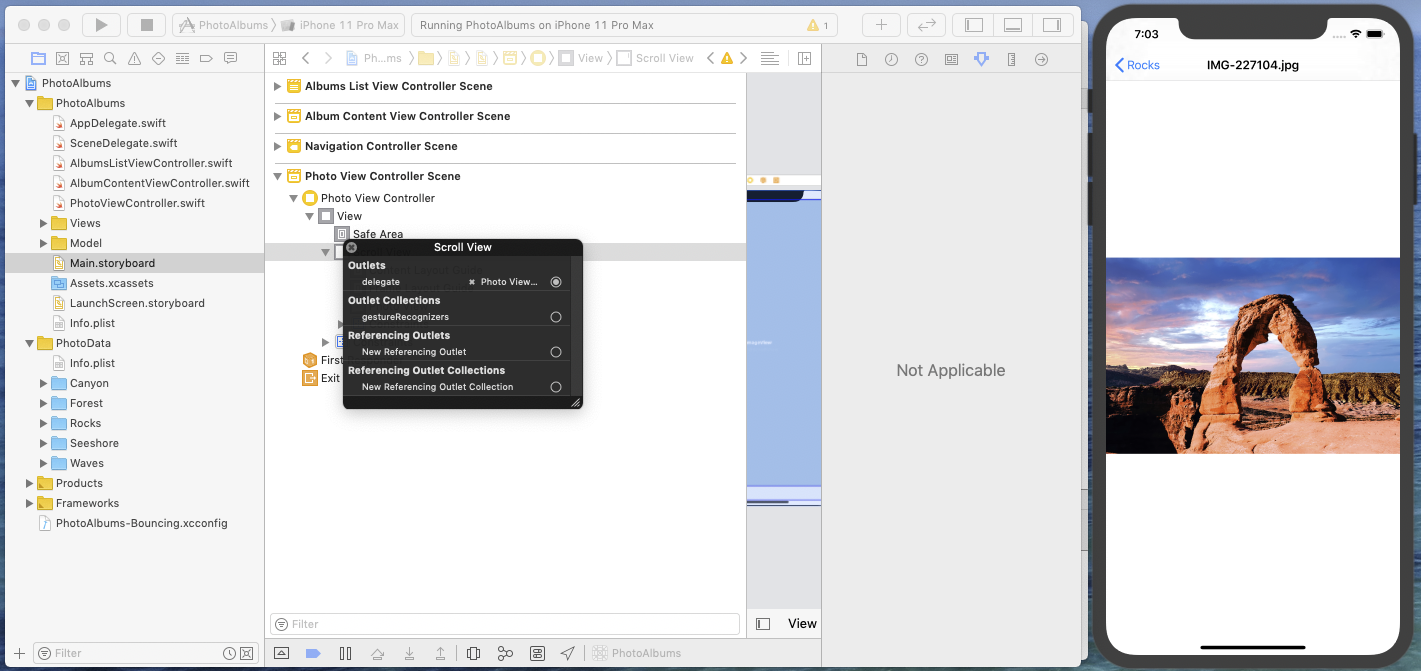
In the Dynamic Storyboards top list, select the Photo View Controller in the Main storyboard (this view controller already has a storyboard identifier set, so it is enabled).
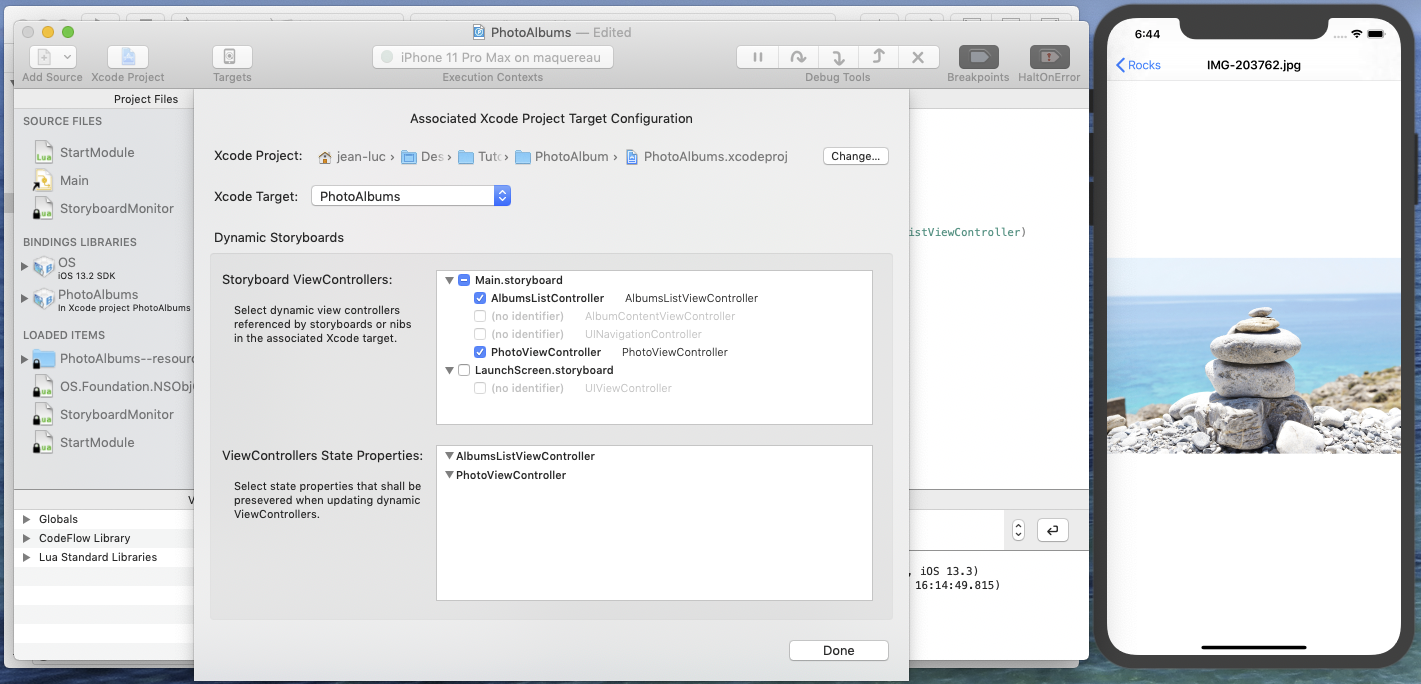
In the bottom ViewController State Properties list, you can see candidate state properties for the PhotoViewController class, but this list is currently empty and we need to declare photoURL as a state property… What is currently missing here?
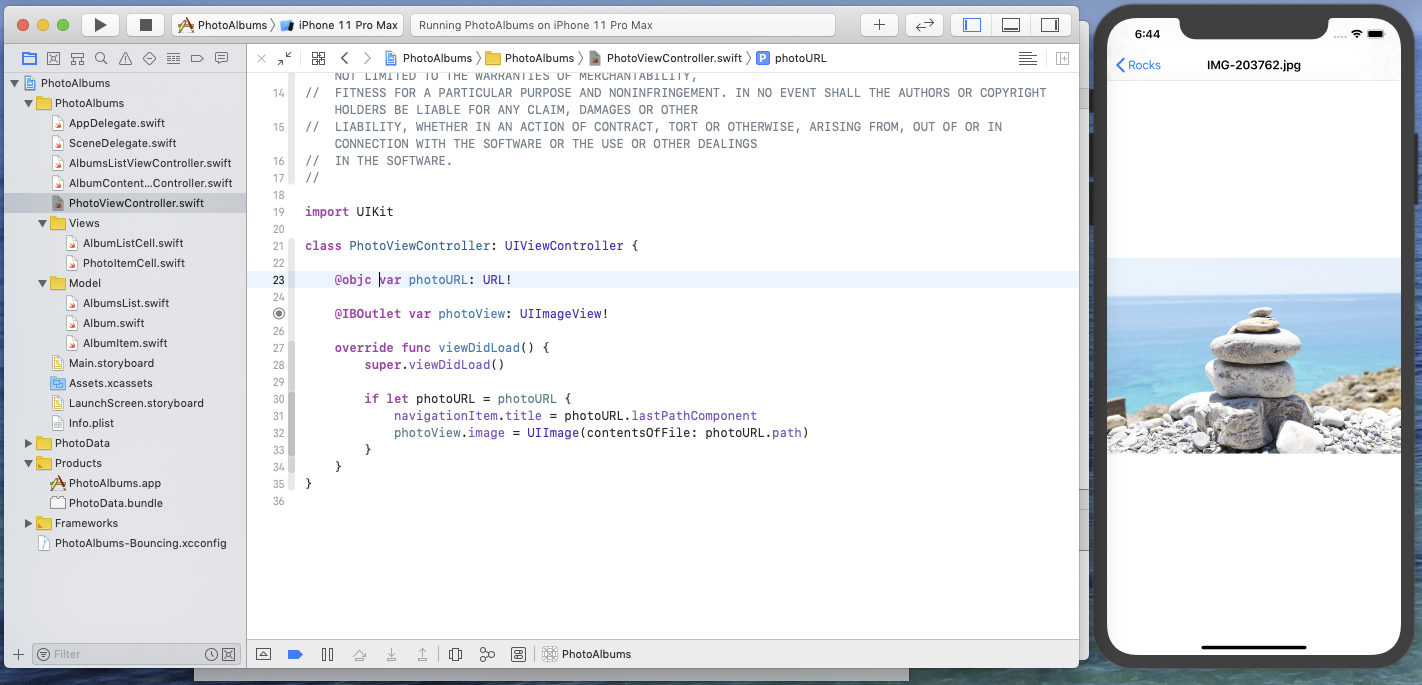
In fact, Bounces execution contexts use the objc runtime for dynamic communication with the target application, and the photoURL property (defined in Swift) is by default not visible by the objc runtime. But this is an easy fix. :)
Switch to Xcode, select the PhotoViewController code and add a @objc qualifier to the photoURL property definition.
Switch back to Bounces. After a few seconds, photoURL appears in the PhotoViewController state properties list.

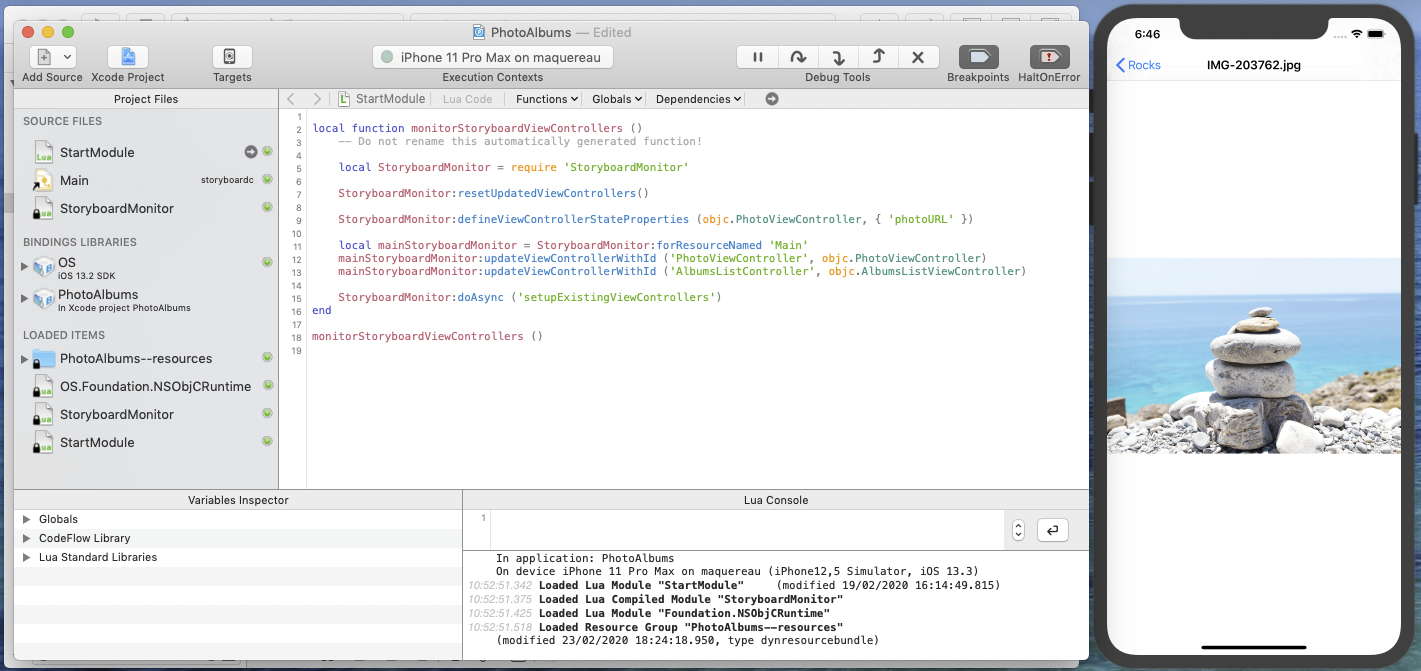
Select photoURL as state property and click on the Done button to dismiss the associated Xcode project target configuration sheet. You can see that code in the StartModule has been updated, so it now includes monitoring of the Photo View Controller in the Main storyboard, as well as the declaration of a state property named 'photoURL' for the PhotoViewController class.
As a rule of thumb, after changing the associated Xcode project configuration, you shall generally restart the target application, to ensure that these changes are correctly taken into account. So, switch to Xcode and run the target application again.
Navigate in the target application to show a photo in the Photo View Controller.
To test if dynamic updates are correctly configured, in the Main storyboard set a background color to the Photo View and save.
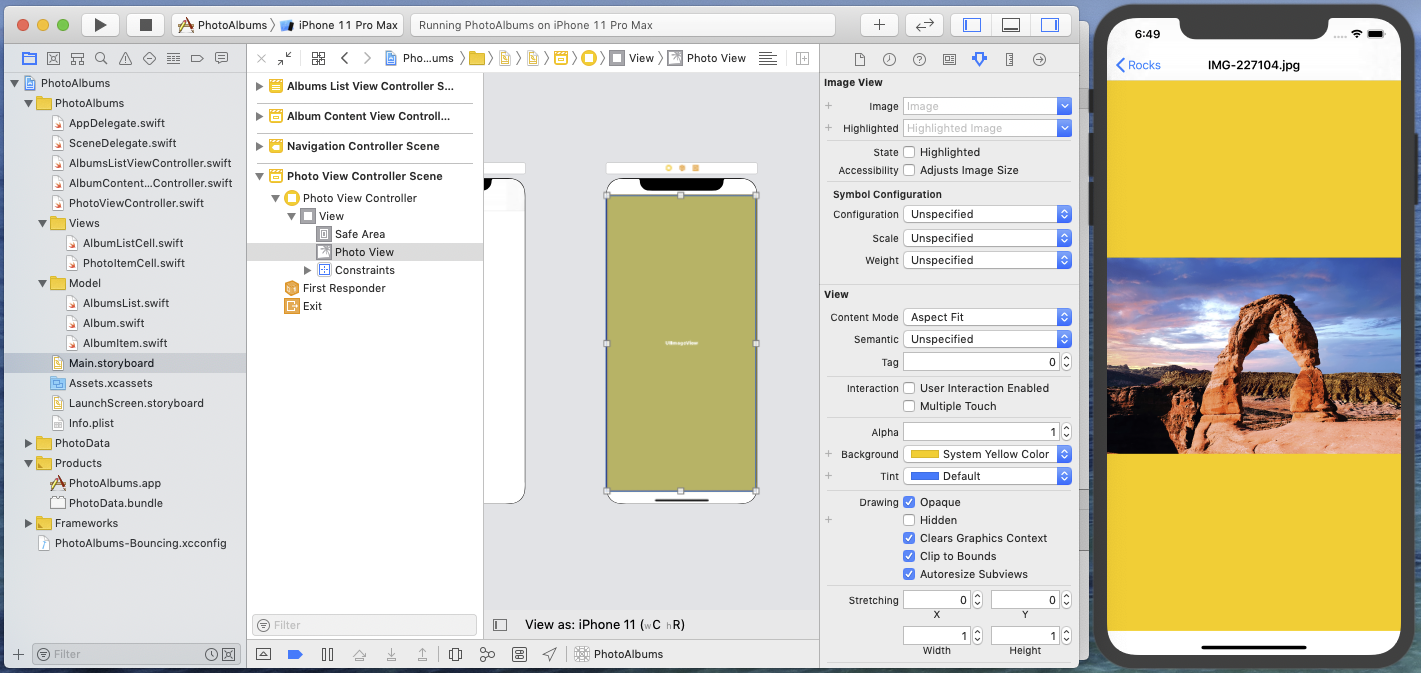
The background color appears in the target application and the displayed photo has not changed: this means that the current value of the photoURL state property has been correctly copied to the updated view controller.
All this is well and good. Configuring the Photo View Controller for dynamic updates was a a few quick-and-easy steps (actually much longer to explain than to execute :)
You can now undo the background color change (unless you want to keep it) and start working on actual improvements of this photo viewer screen.
Zooming the photo view
Adding a scroll view in the storyboard
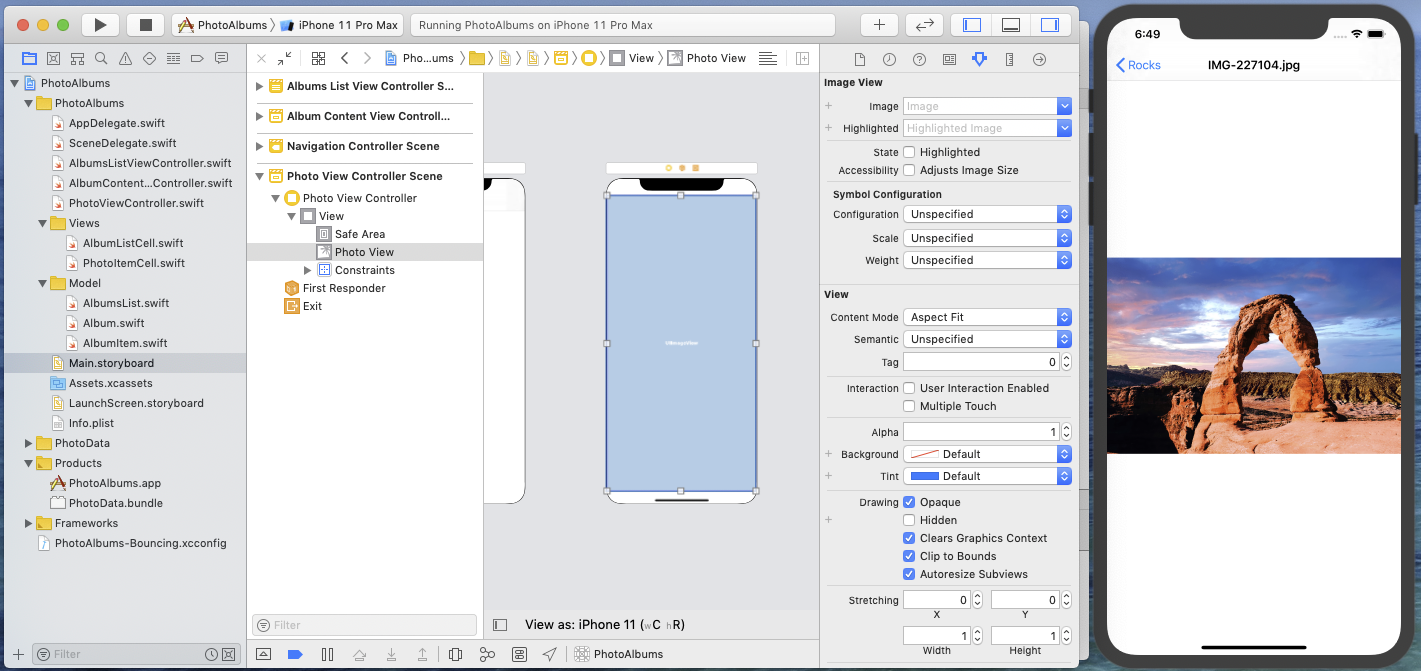
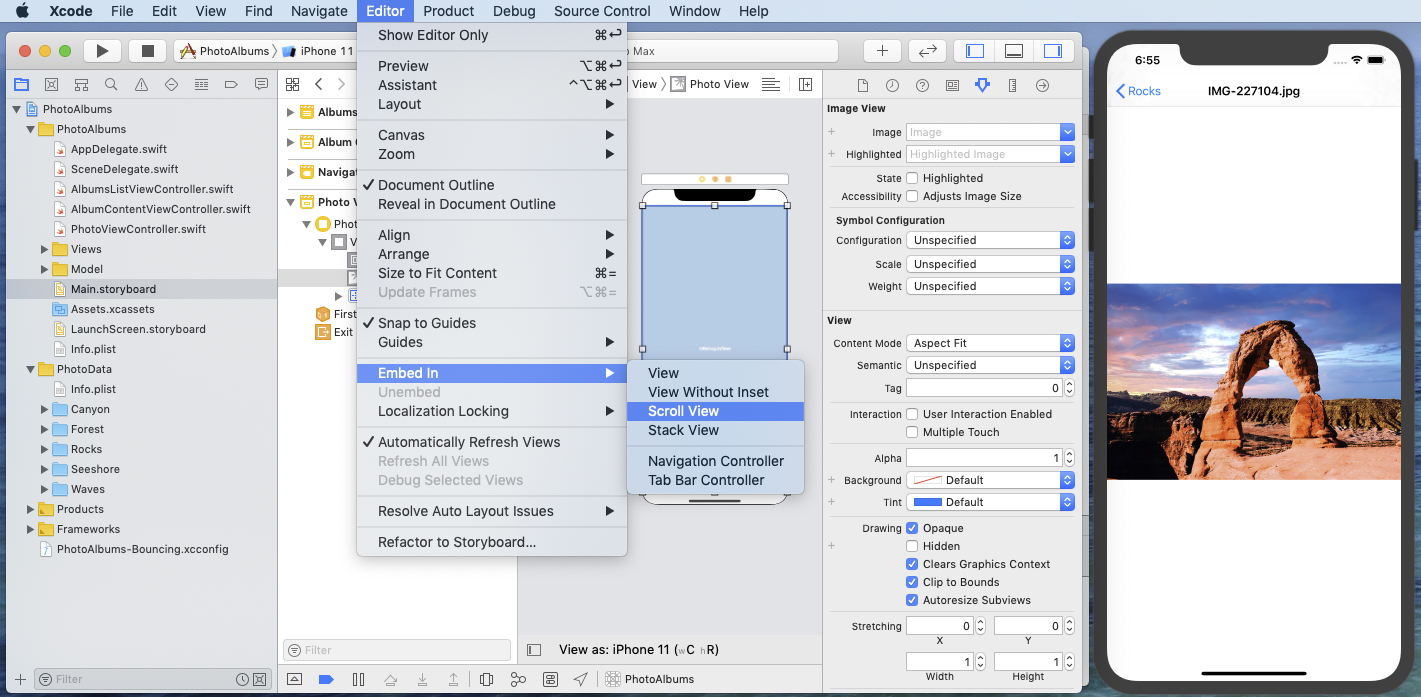
To add pinch-to-zoom to the Photo View, start by embedding the Photo View in a scroll view:
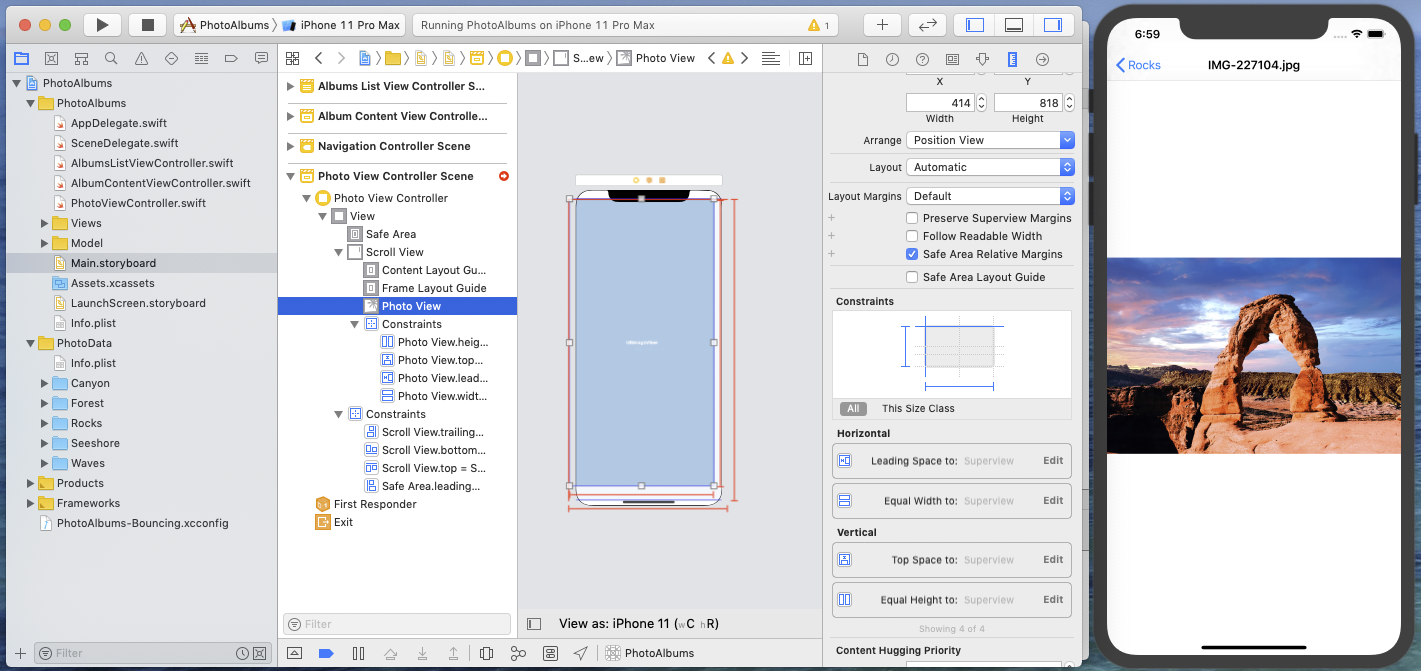
Then add layout constraints to pin the scroll view in its parent view.
Add constraints to specify the size of the photo view as equal to the scroll view size, so that the photo view fills the entire scroll view by default. Also add top and leading space constraints to place the photo view in its parent scroll view.
Save the storyboard. The current photo should keep its current location and size. Otherwise, adjust the layout constraints until you get the expected result.
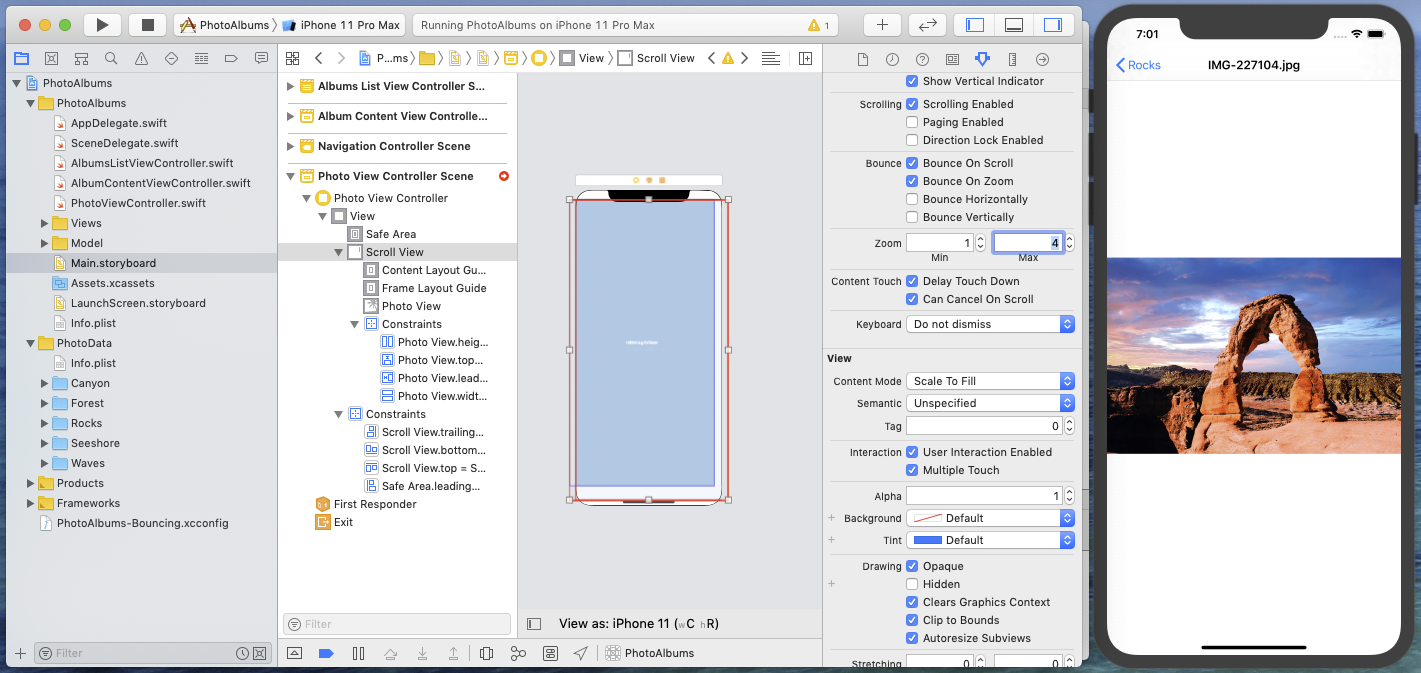
Now let's add zooming to the scroll view.
In the scroll view properties, set the max zoom value to 4 and leave the min zoom value to 1 (since the entire photo is visible if the zoom scale is 1).
Although a max zoom value is set, pinch-to-zoom still doesn't work in the target application.
Let's have a look at the UIScrollView documentation. It says that: for zooming and panning to work, the scroll view must have a delegate and this delegate must implement viewForZooming(in:).
A bit of code is required there, but this doesn't mean that you have to stop the target application.
Add the UIScrollViewDelegate protocol to the PhotoViewController class…

… and connect the scroll view delegate to the Photo View Controller in the storyboard.
Now, in this simple case, you could add a viewForZooming(in:) method in PhotoViewController.swift, restart the target application, navigate again to a Photo View Controller screen, and test if the zoom feature is working.
But you can also add this method without leaving the current screen, by using some easy Lua scripting and this is what you will learn to do just now. :)
Using Lua scripting to complete the zoom feature
Using Lua scripting in Bounces, you can write code which is immediately available in the target application without having to restart it. And this is especially useful for extending target app classes while the app is running.
Here we want to extend the PhotoViewController class. To do this, click on the Add Source button in the Bounces project toolbar and, in the list of proposed new files, select the Lua module named PhotoViewController (StoryboardMonitorAdditions).
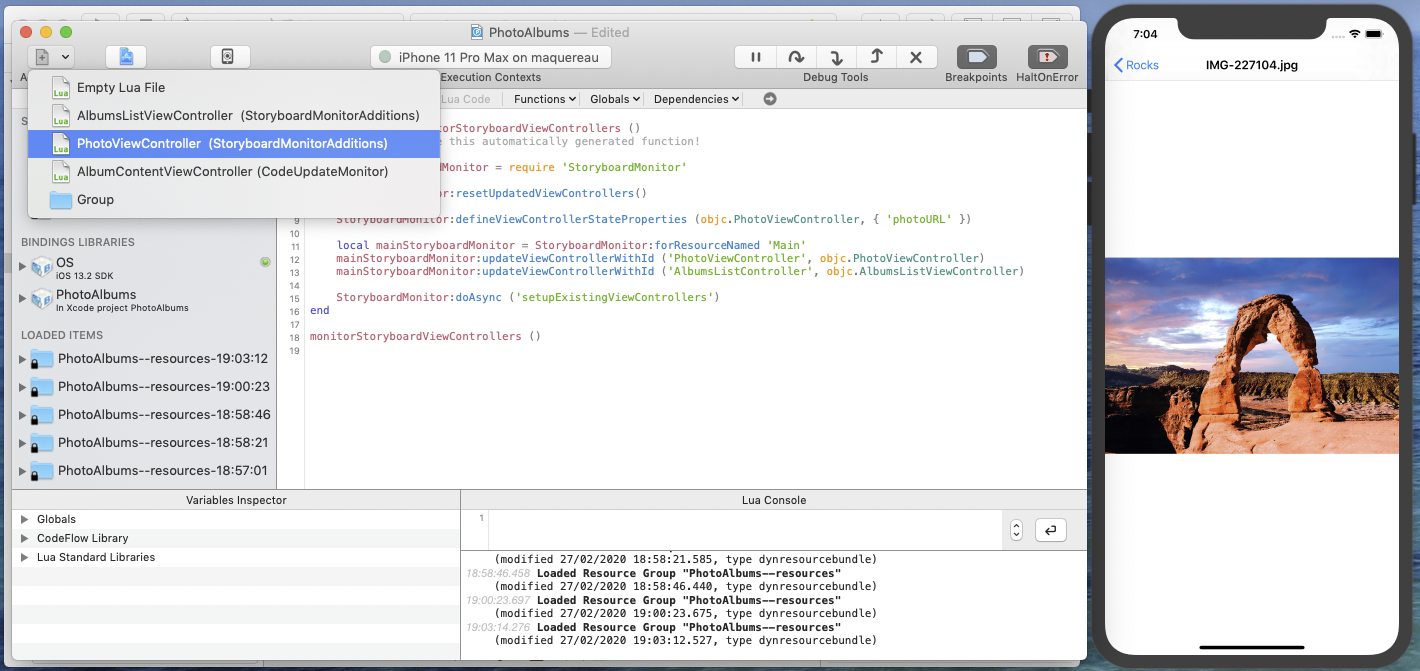
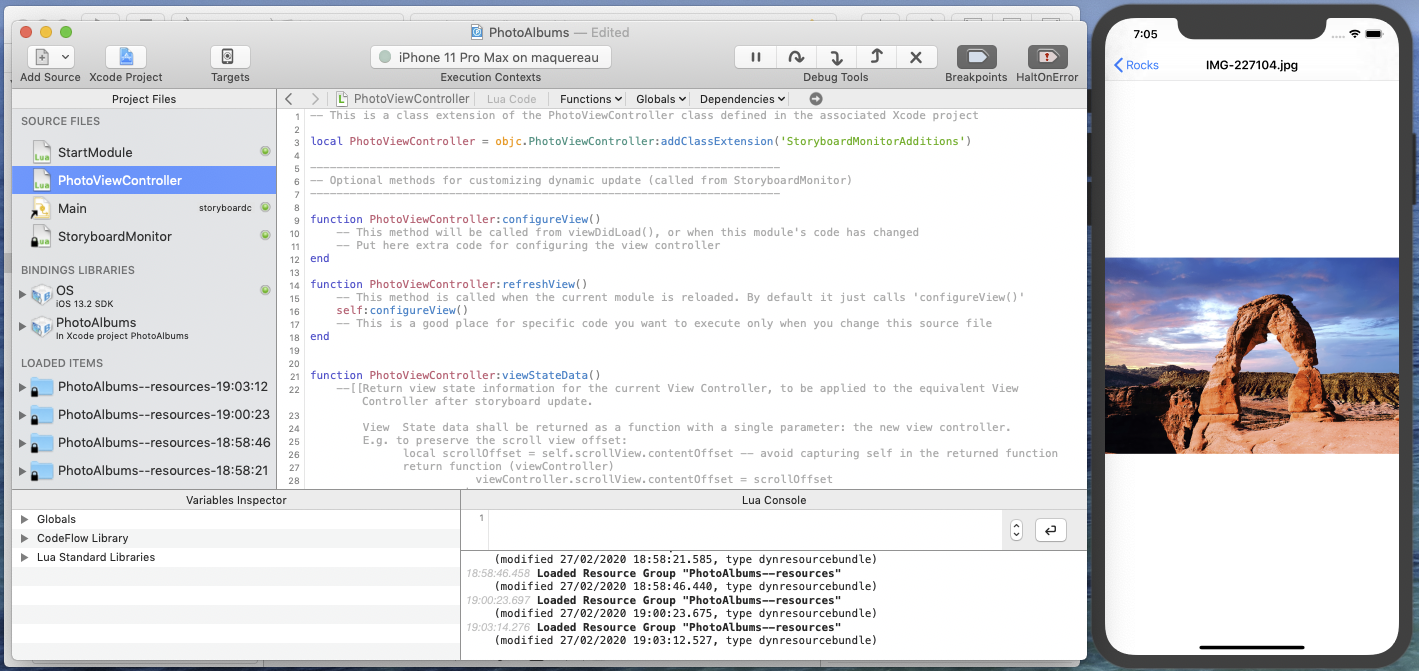
This adds a PhotoViewController Lua module to your project, that contains a ready-to-use class extension of the native PhotoViewController class. This class extension defines a few empty methods which can be used to customize dynamic storyboard updates for this ViewController class.
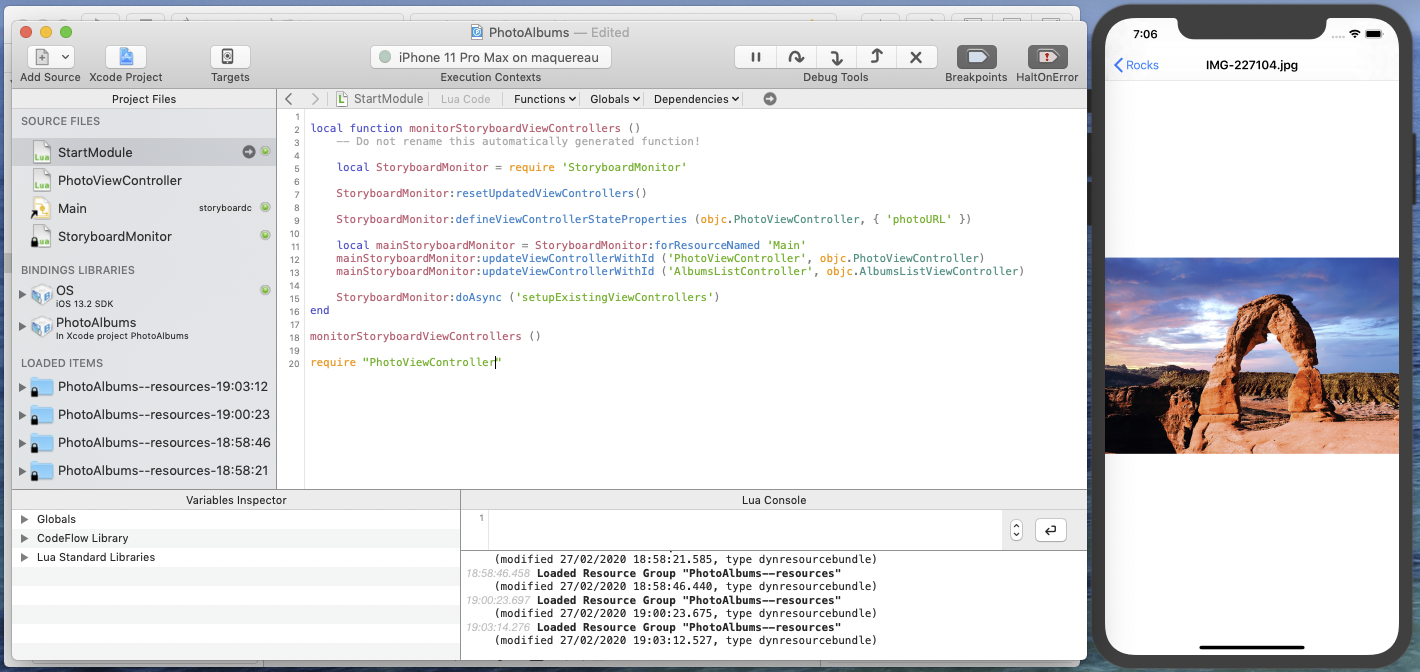
To ensure that the PhotoViewController class extension will be loaded the next times you run the target application, add the following line at the bottom of the StartModule:
require "PhotoViewController"
Now in the PhotoViewController module, implement the UIScrollViewDelegate method required for supporting zoom, i.e. add a viewForZoomingInScrollView method that simply returns the controller's photoView property:
function PhotoViewController:viewForZoomingInScrollView (scrollView)
    return self.photoView
end
Then load the PhotoViewController module into the target application by selecting Load Lua Module in the Execute menu.

The PhotoViewController module gets loaded in the target application and the pinch-to-zoom feature becomes immediately active.
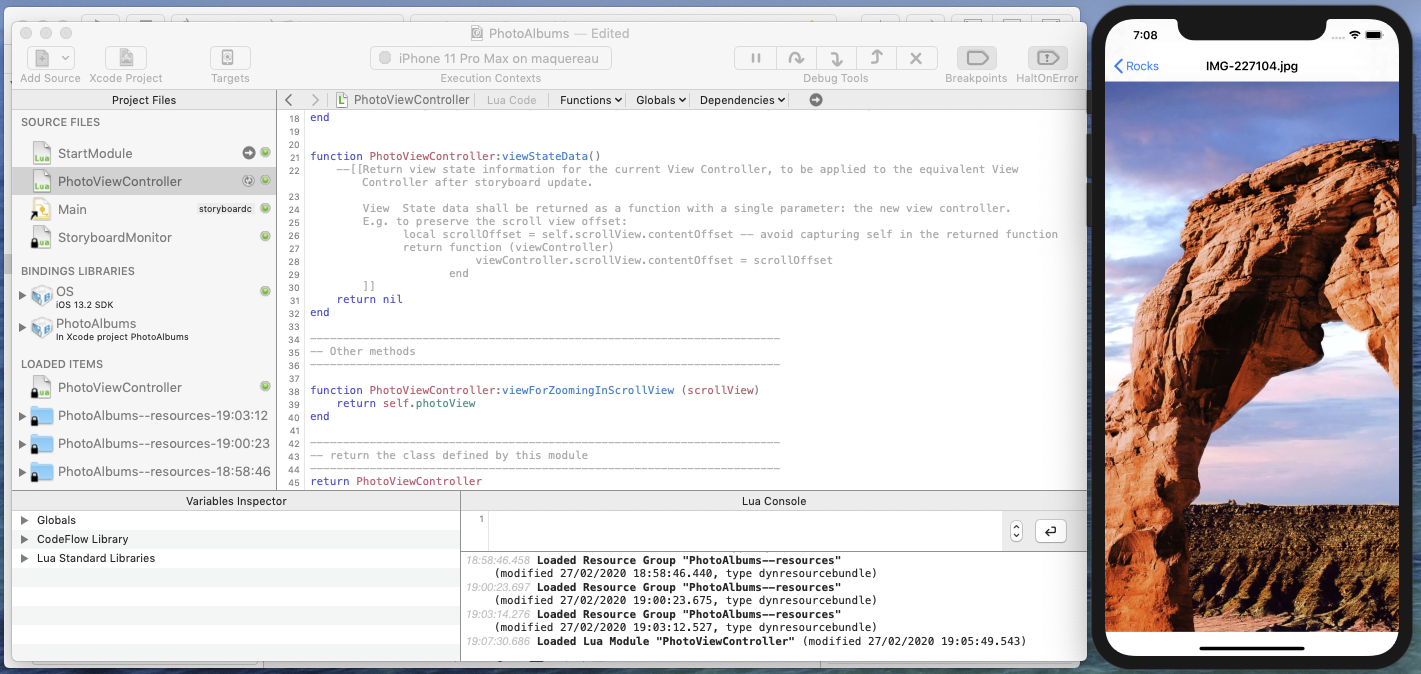
Notice that the PhotoViewController module appears in the LOADED ITEMS list as well as in the Lua console traces.
Now activate Automatically Reload Module in the Execute menu (or cmd U) and comment-out the viewForZoomingInScrollView method (triple-click on the method and menu Syntax > Comment Selection or cmd -): zooming does not work anymore. Uncommenting the selection (cmd - again) will immediately restore the zoom feature!
Preserving the View State
Now that photo can be zoomed and panned, the Photo View Controller has clearly been improved, but it may still require a few tweaks. For example, the scroll view max zoom value could be increased. In Xcode storyboard editor, set this max zoom value to 8, and save.
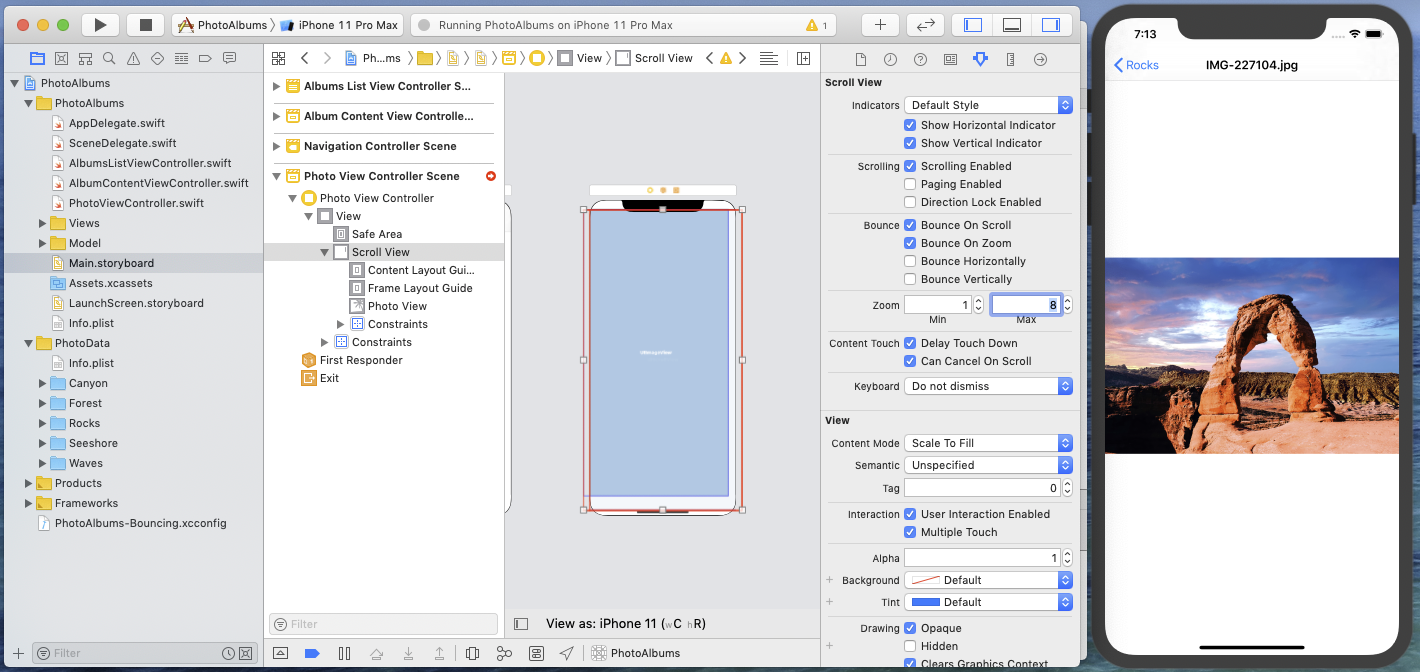
The photo returned to its unzoomed state! This is due to the storyboard update, which caused the replacement of the current PhotoViewController instance by a new instance created from the updated storyboard. This new instance gets the values of its state properties (the photo URL in this case) from the replaced view controller, as we have seen previously in this tutorial. But other attributes of the view controller's view hierarchy, like the scroll view's current zoom scale are not defined as state properties. Therefore the replacing view controller gets default attributes for its view hierarchy, and the photo gets displayed with a zoom=1 value.
This is not really a problem in the app, since it can not appear during normal target application usage, but keeping the photo zooming state during storyboard updates would clearly bring a better developer experience.
This is precisely the role of the viewStateData method defined in our PhotoViewController Lua extension module. Currently this method doesn't do anything and returns nil, but this is the right place to implement view state preservation without impacting the native PhotoViewController class definition.
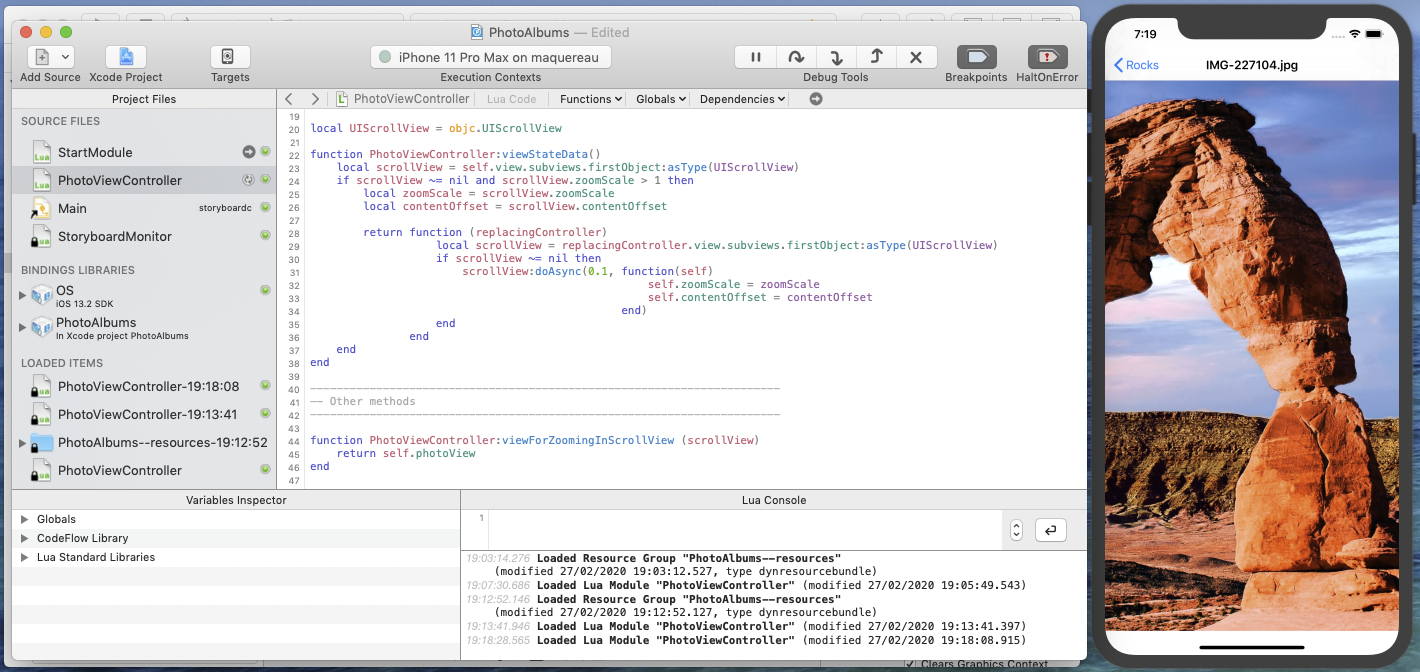
In the PhotoViewController Lua module, replace the code of method PhotoViewController:viewStateData() with the following:
local UIScrollView = objc.UIScrollView

function PhotoViewController:viewStateData()
    local scrollView = self.view.subviews.firstObject:asType(UIScrollView)
    if scrollView ~= nil and scrollView.zoomScale > 1 then
        local zoomScale = scrollView.zoomScale
        local contentOffset = scrollView.contentOffset

        return function (replacingController)
                   local scrollView = replacingController.view.subviews.firstObject:asType(UIScrollView)
                   if scrollView ~= nil then
                       scrollView:doAsync(0.1, function(self)
                                                   self.zoomScale = zoomScale
                                                   self.contentOffset = contentOffset
                                               end)
                   end
               end
    end
end
What this method does:
- Lines 4-5: get the scrollView in the current Photo View Controller, by considering the first subview of the controller's view and checking if this is a
UIScrollView(think of:asType()as equivalent toas?in Swift). If not aUIScrollViewor if the zoom scale is 1, the rest of the method is skipped. - Lines 6-7: store he scroll view zoom scale and content offset in local variables, that can safely be captured by the returned function without capturing
selforscrollView. - Lines 9-17: return a view state restoration function, that will be called on the replacing view controller, after its native
viewDidLoad()method returns. - Lines 10-11: get the photo scroll view of the replacing controller (same as above).
- Lines 12-15: set the zoom scale and content offset of the new scroll view, after a 0.1s delay, with the values captured on lines 6-7. The
selfparameter in the function on line 12 refers to thedoAsynccaller, i.e. thescrollViewvariable.
Note that using asynchronous delayed execution here is a simple way to wait until the new scroll view has its layout complete before modifying its zoom scale or content offset (and it is acceptable here because this method is only used for app development!).
Now in the target application, apply some zooming and panning to the photo.
Do any change to the Photo View Controller in the storyboard (e.g. set the max zoom value to 6) and save.
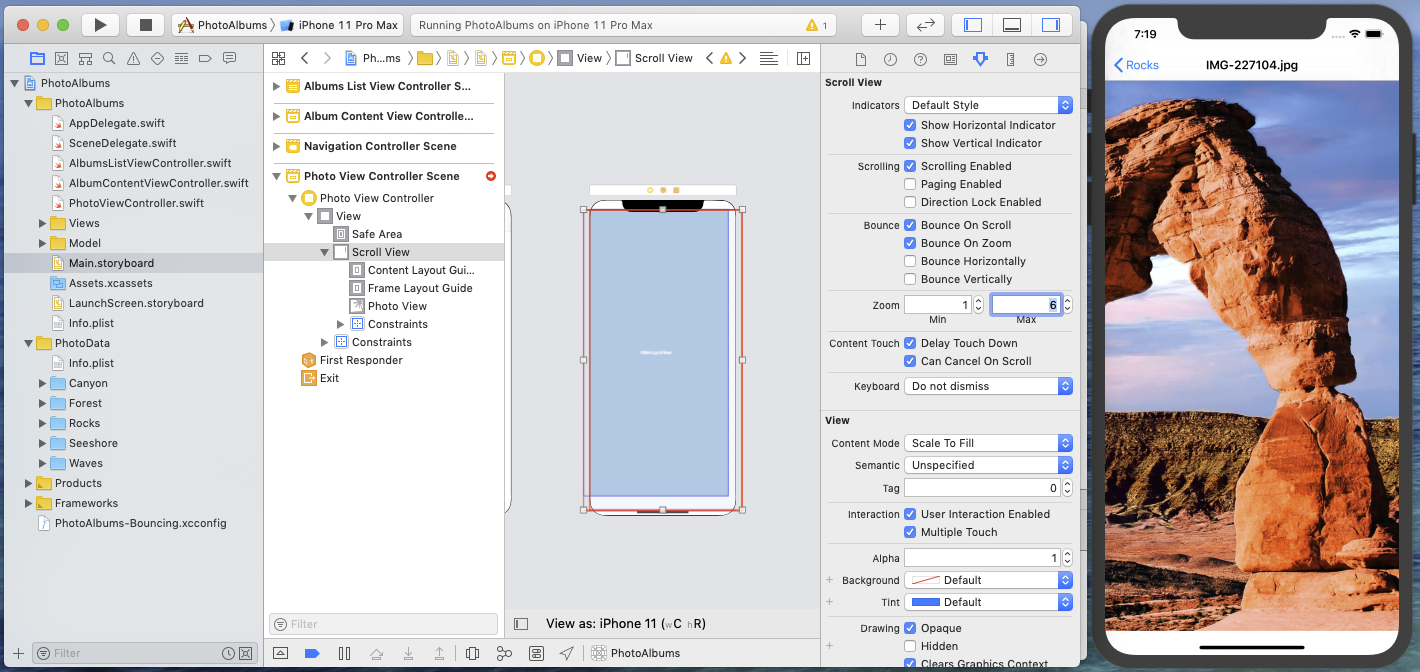
The displayed portion of the photo stays the same. This means that the view state preservation method has successfully been executed.
Wrap up and next step
This second part of the Storyboard Updates In Depth Tutorial has introduced a few important points for mastering dynamic storyboard updates in a target application:
- Controller state: when you declare a view controller as dynamic, you shall generally specify one ore more state properties whose value will be preserved when updating this view controller.
- Lua extension: using Lua scripting you can easily extend you app view controllers with code immediately available to the target application without having to restart it.
- View state: by writing short view state preservation methods, you can get a seamless view controller update experience.
If you want to test the PhotoAlbums project in its current state at this point, you can download the PhotoAlbums project (step 2).
The Photo View Controller has greatly been improved with the zoom feature, but it would be really cool to have the possibility to navigate between photos of the current album without leaving this screen. In the third part of this tutorial Storyboard Updates In Depth - Part 3 - Dealing with Complex View Controller State, you will implement photo navigation in the photo detail screen, and you will learn how to master dynamic storyboard update for a more sophisticated view controller.
Post a Comment