Project Creation and Configuration
This document presents the different ways to create a project and configure it in Bounces.
This document presents the different ways to create a project and configure it in Bounces.
Project creation
Bounces has two main paths for creating a project: create an empty project or use a project template.
Empty project
Selecting New Project in the File menu creates a new empty project.
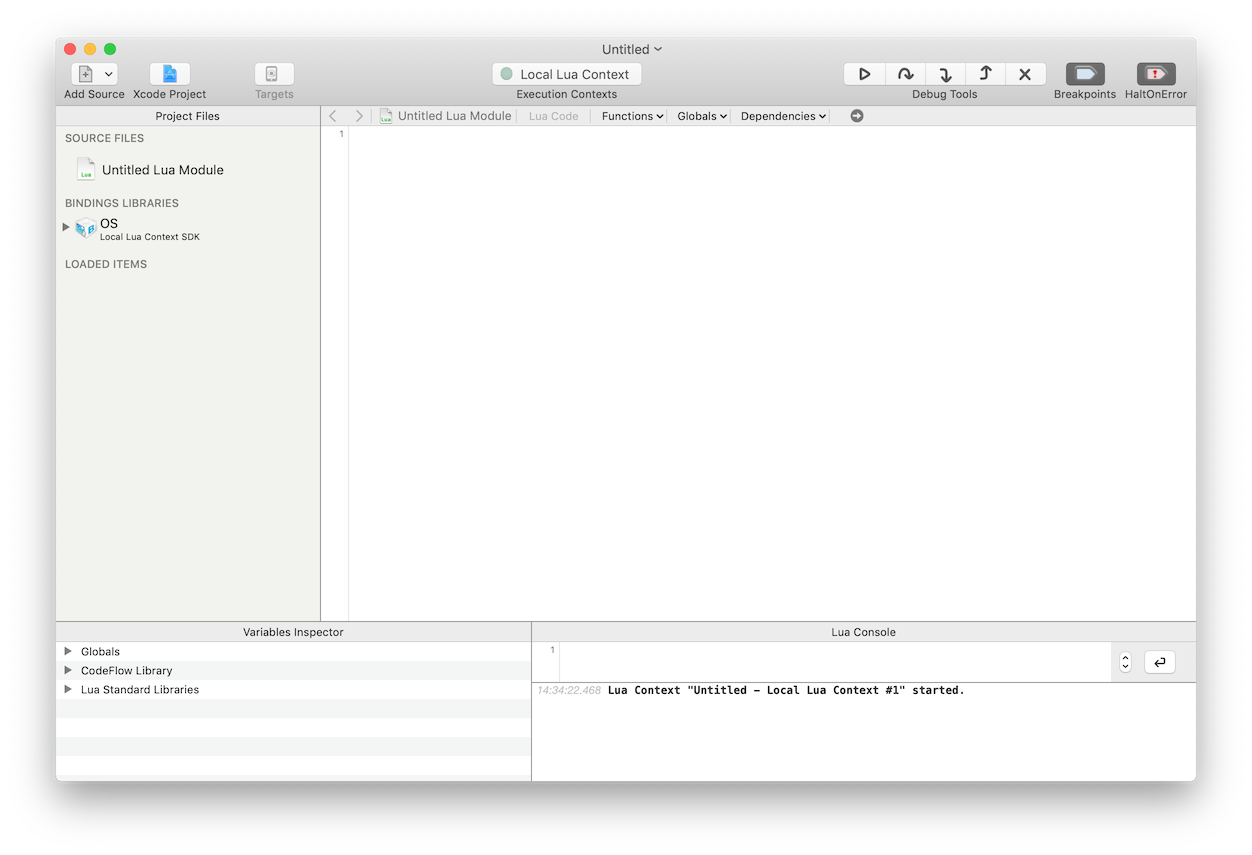
This empty project is not associated with an Xcode project, and it runs a Local Lua Context, enabling Lua code execution inside Bounces.
To associate this project with an existing Xcode project, click the Xcode Project button in the toolbar. (For more detail on Associated Xcode project configuration, read the corresponding section below)
Project template
To create a project based on a template, you select New Project from Template… in the File menu.
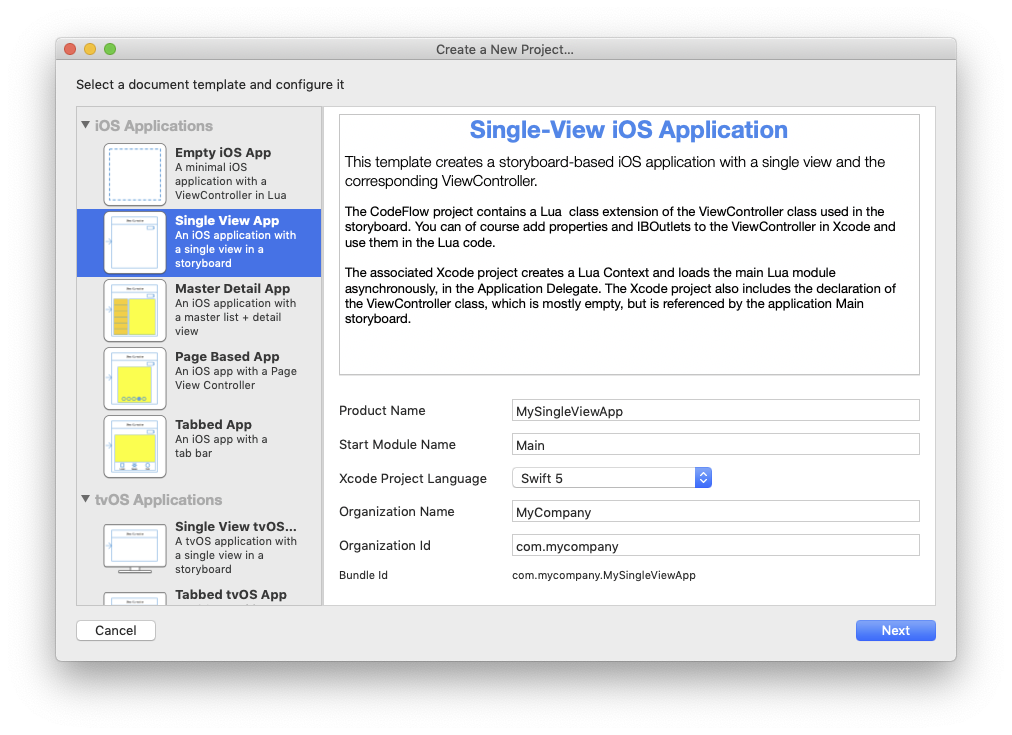
Select a project template, fill project information fields, click on the Next button, and select a location for saving the new project. In this location, a project directory is created, that contains a Bounces project and its associated Xcode project.
The new Bounces project window appears and the project's configuration is completed.
From there you can open the associated Xcode project from Bounces by pressing cmd shift O, or by selecting Open Xcode Project in the Program menu, and directly run the target application.
The Bounces project automatically detect that the target application is running and it connects to the target app's Lua execution context.
And this is it! You can now start to live-update your new project, both at the storyboard level or by adding Lua code into the ViewController source file.
Associated Xcode project configuration
In this section, we will follow the necessary steps to configure an existing Xcode project in order to bring dynamic storyboard updates to the corresponding application.
Select an associated Xcode project
To set the associated Xcode project for a Bounces project (an empty project in this example), click on the Xcode Project button in the project window toolbar, or select Configure Association with Xcode Project… in the Program menu. A file selection dialog is displayed.
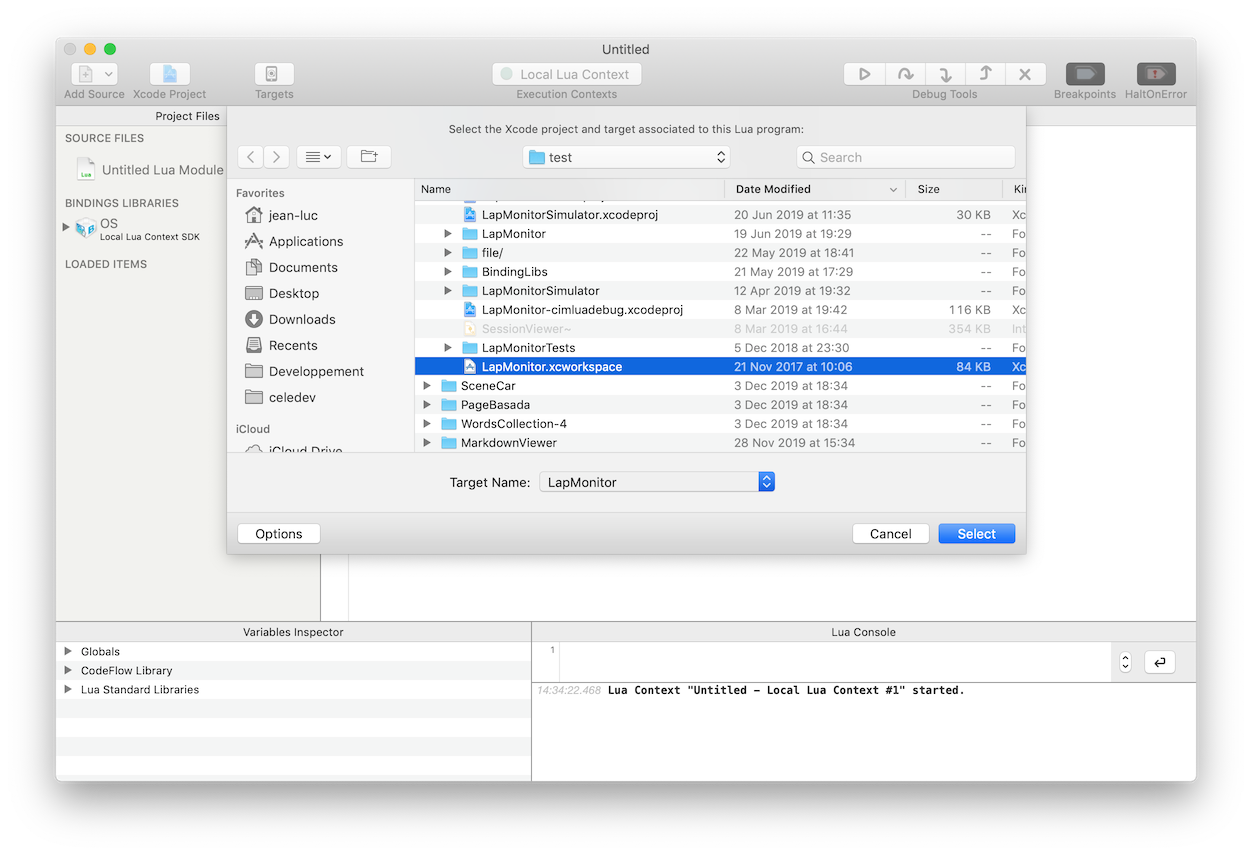
In this file selection dialog, you can select an Xcode project or workspace. When one is selected, a Target Name popup menu presents a list of compatible Xcode targets in this project or workspace. Choose the target associated with your Bounces project and click on the Select button.
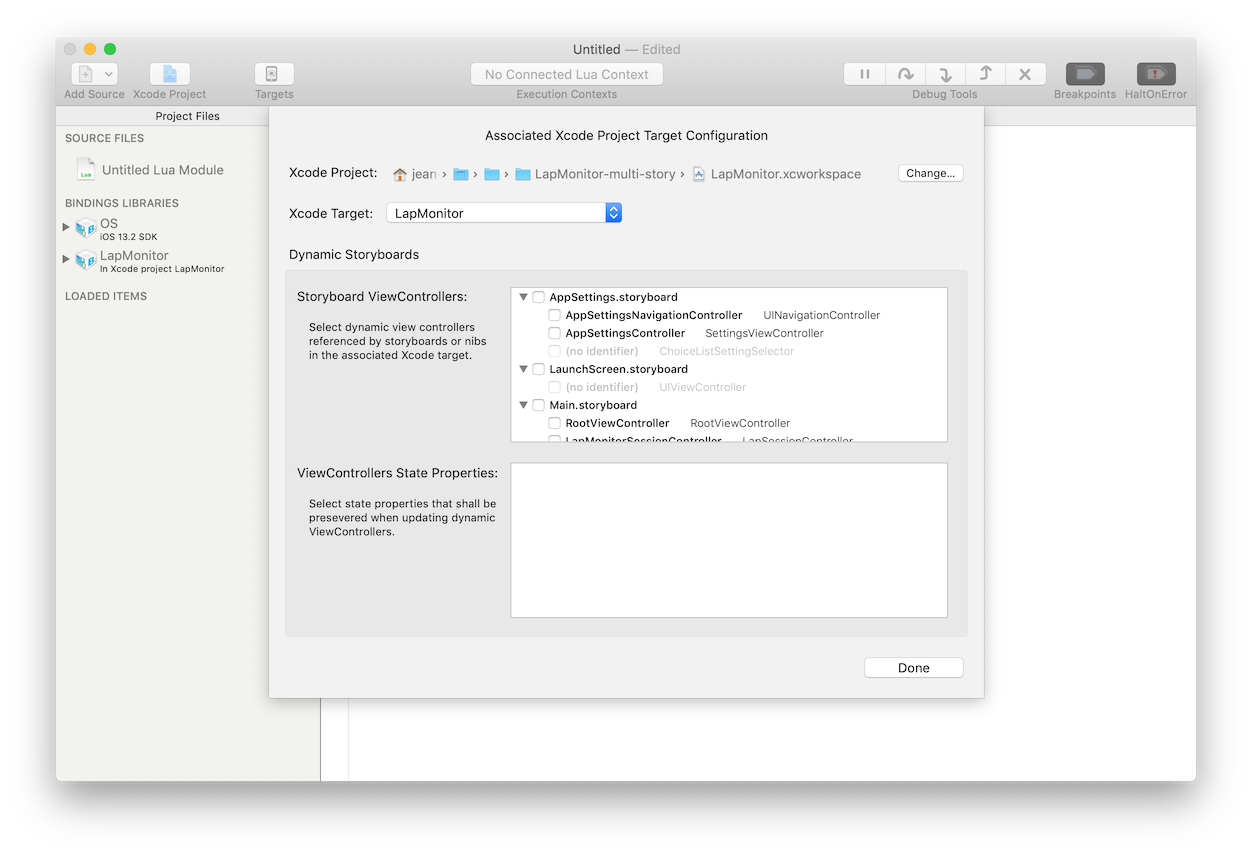
An Associated Xcode Project Target Configuration dialog is displayed.
As you can see, selecting an associated Xcode project and target has caused changes in the BINDINGS LIBRARIES section of the Project Files list:
The OS Bindings Library has been changed from Local Lua Context SDK into iOS 13.2 SDK, because the associated Xcode target is an iOS application using the default iOS SDK.
A project-specific Bindings Library has been added, that exposes native classes and APIs declared by the associated Xcode target to Lua.
Configure storyboard updates
If you don't use dynamic storyboard update in your project, you can skip this step.
In the Xcode Project Target Configuration dialog, you can configure a set of storyboard View Controllers that you want to be dynamically updated. This configuration interface is grouped in the Dynamic Storyboards box, and it is divided in two lists:
The upper list shows the Storyboards used by the selected Xcode target and the View Controllers declared by each storyboard.
A View Controller in a storyboard is identified by its storyboard ID and its class; only View Controllers having a storyboard ID can be dynamically updated.The lower list allows the selection of State Properties for he dynamically updated storyboards. This list is initially empty.
Select the View Controllers that you want to dynamically update in the list.
Tip: if a View Controller can not be selected because it has no storyboard identifier, you can simply edit the corresponding storyboard in Xcode and set a storyboard ID for this ViewController. When you switch back to Bounces, View Controllers in the list are automatically updated and you now have the possibility to select the View Controller.
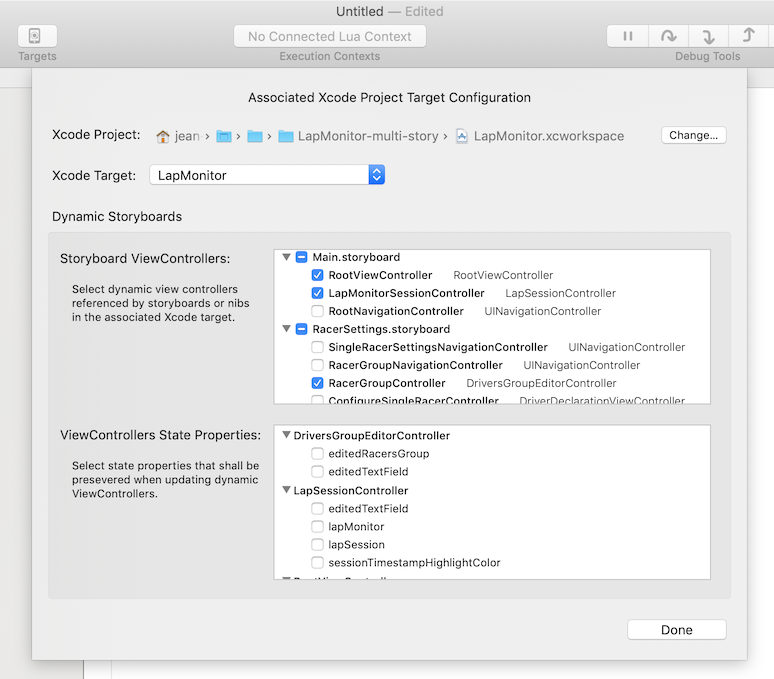
When you select a View Controller, candidate state properties for this selected View Controller class are added to the state properties list. Select the properties you want to preserve when the ViewController is updated.
Note: Bounces Lua execution contexts have access only to non-private properties exposed to the objc runtime. If a state property defined in Swift does not appear in the list, switch to Xcode and make the property objc-compatible. It will automatically be proposed in the State Properties list when switching back to Bounces.
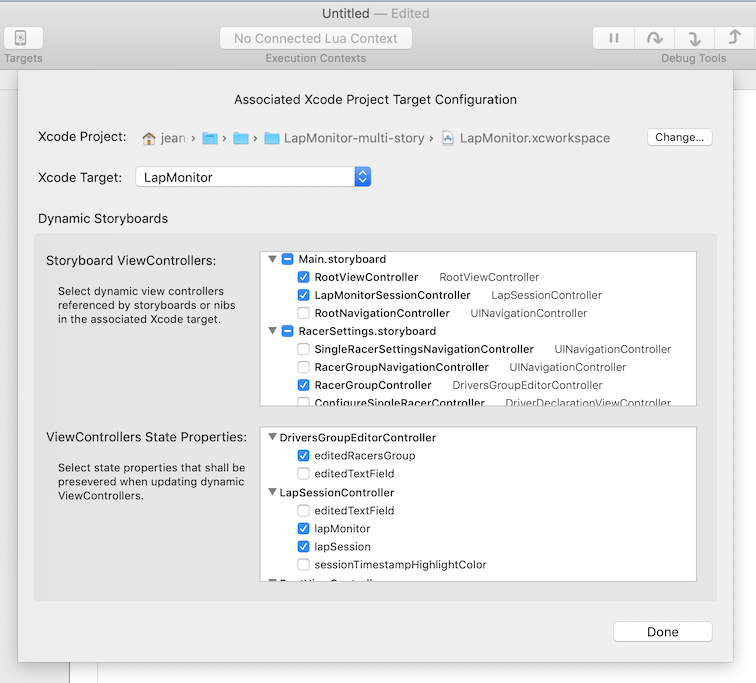
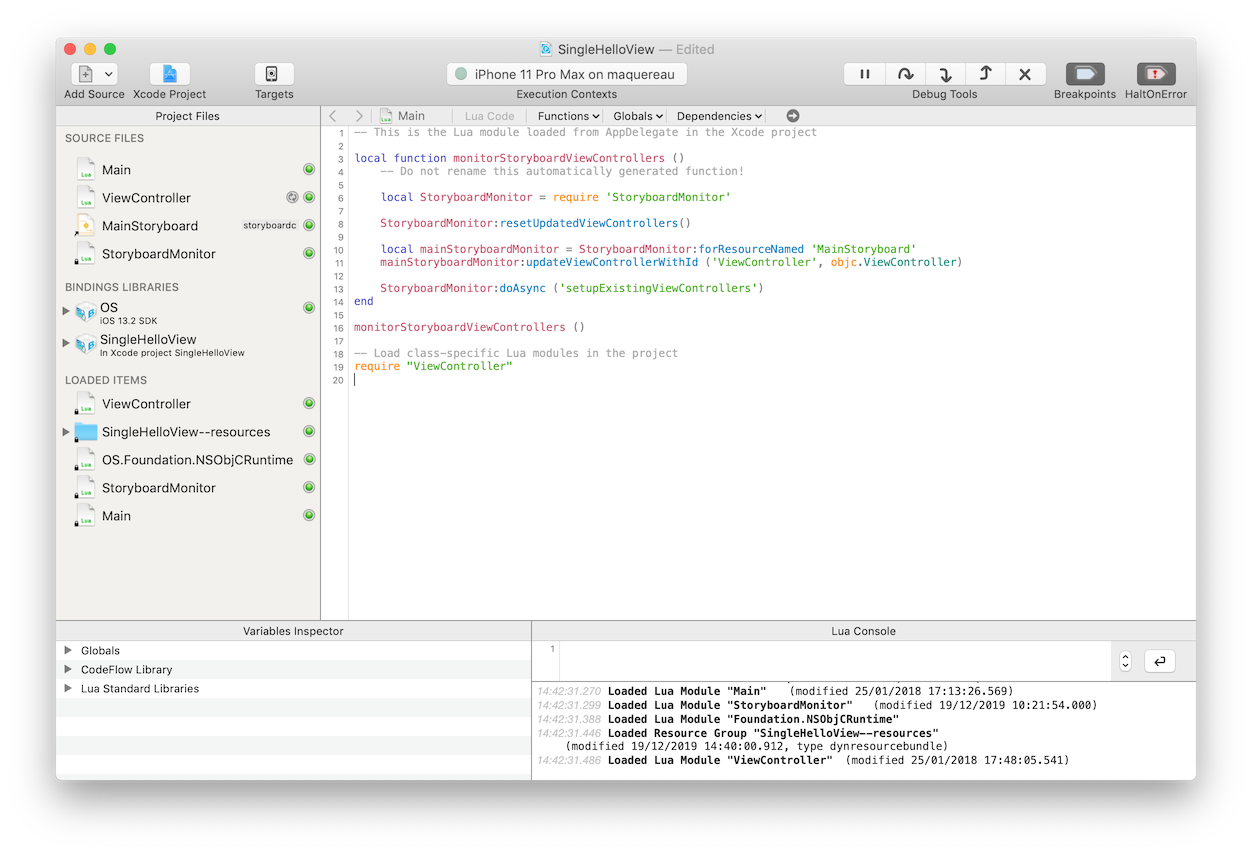
When you are done, click on the Done button. The project gets configured for the selected storyboards, View Controllers and State properties. It now looks like this:
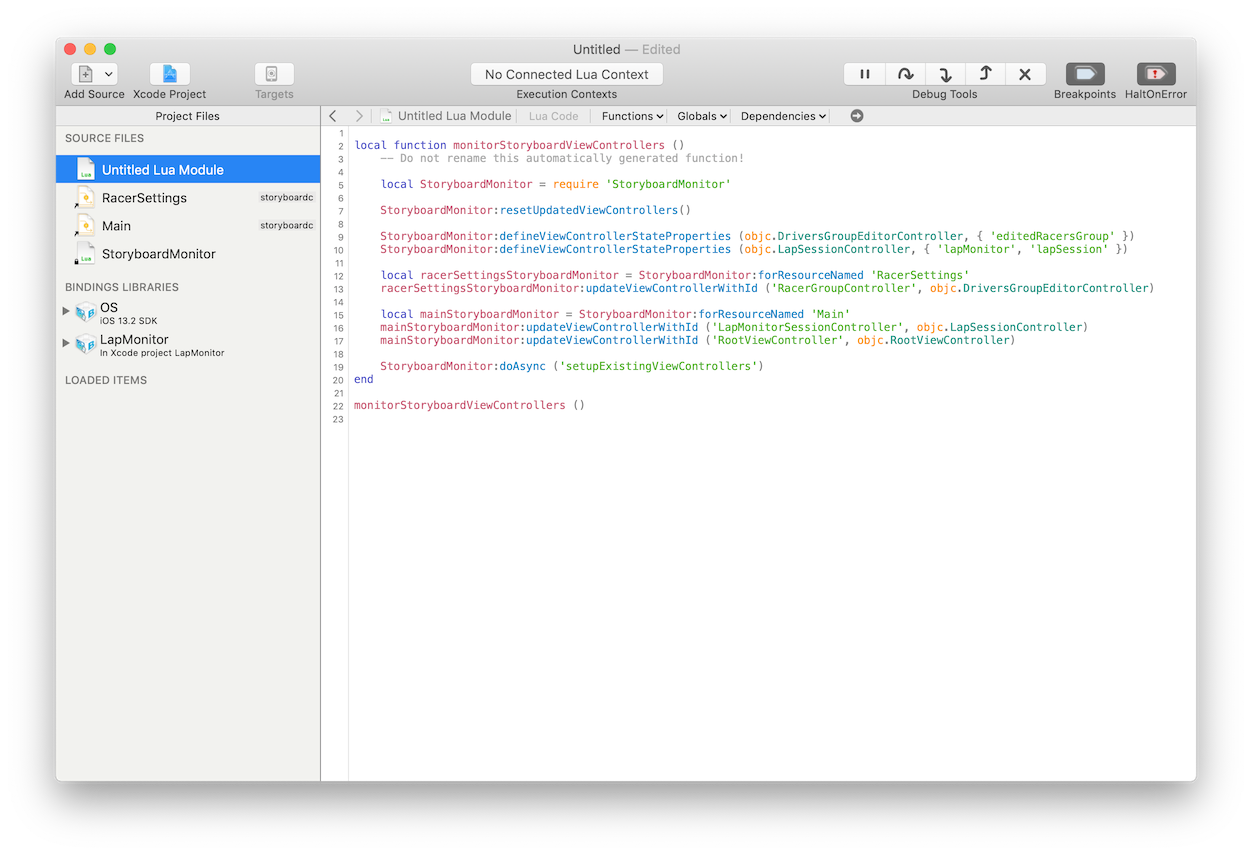
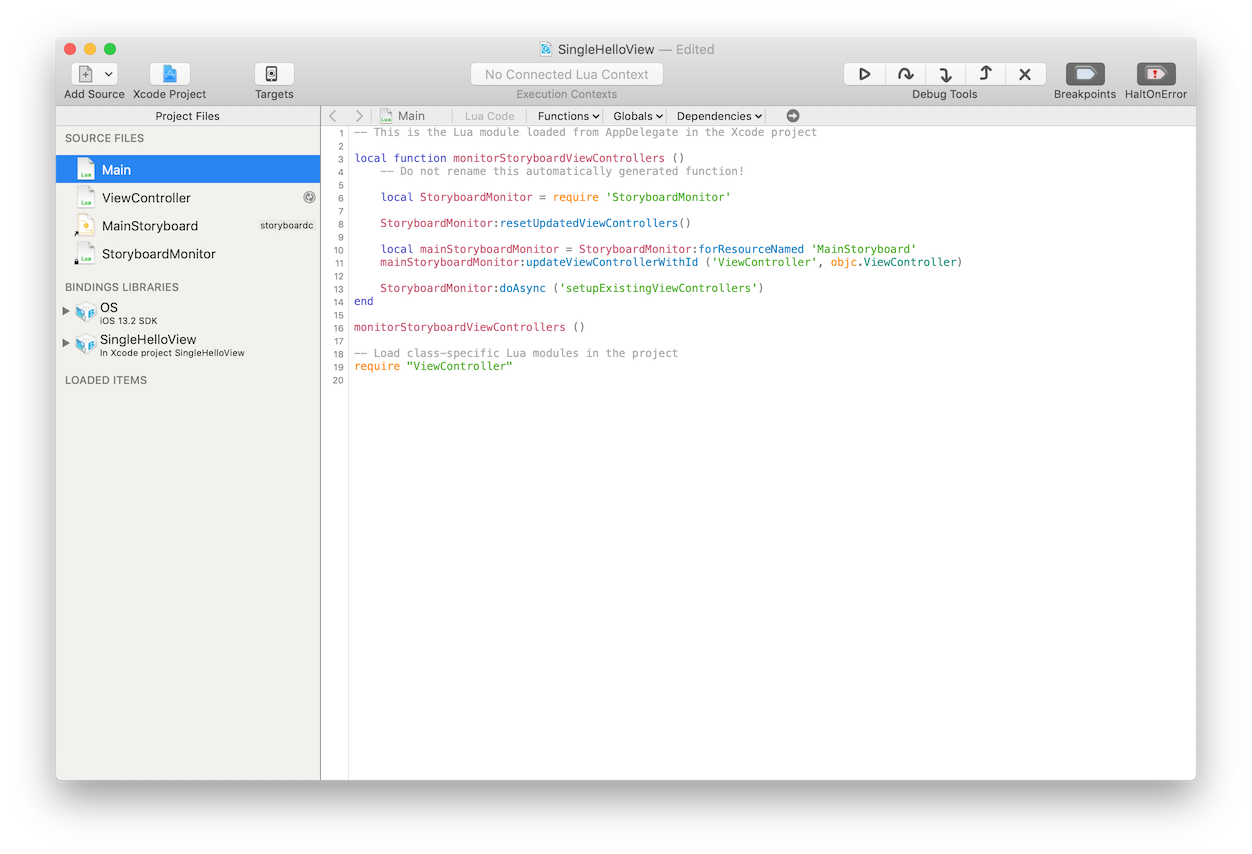
Let's review what the configuration has changed in the Bounces project:
- Storyboard resources have been added, corresponding to the selected storyboards in the Associated Project Target Configuration dialog.
- A StoryboardMonitor Lua module has been added, that manages storyboard updates in the target application.
- Configuration code for storyboards, View Controllers and state variables monitoring has been added to the originally-empty untitled Lua module.
Update the Application delegate in Xcode
Rename the Untitled Lua Module in the Bounces project by clicking on its name, and name it StartModule.
Open the associated Xcode project from Bounces, if needed, by pressing cmd shift O, or by selecting Open Xcode Project in the Program menu.
In the Xcode project application delegate, import the CIMLua framework and add the following one-line code in method application(_, didFinishLaunchingWithOptions):
LuaContext.defaultMonitored.loadModule("StartModule", completion: nil)
This will create a monitored Lua execution context and asynchronously load/run the Lua module named StartModule in this Lua context.
Note: running a monitored Lua Context means that the Lua context can be controlled and debugged from Bounces, so that storyboard and Lua module updates can be sent to the target application.
The App Delegate Swift file should now contain:
import UIKit
import CIMLua

@UIApplicationMain
class AppDelegate: UIResponder, UIApplicationDelegate {

     // ...

    func application(_ application: UIApplication, didFinishLaunchingWithOptions launchOptions: [UIApplication.LaunchOptionsKey: Any]?) -> Bool {
        //...
        // Load a Lua module in a monitored Lua Context
        LuaContext.defaultMonitored.loadModule("StartModule", completion: nil)

        return true
    }
To learn more about Lua Contexts and Bounces native API, please read Using Lua Contexts.
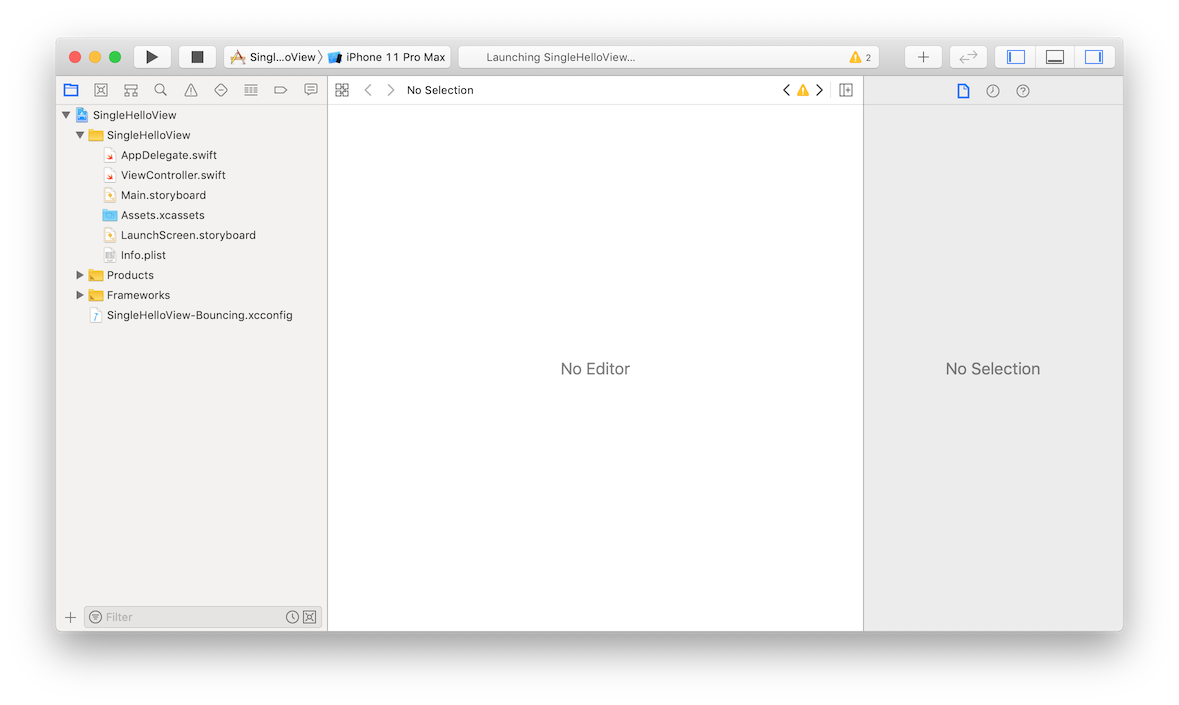
Run the target application
When you run the target application, the Bounces project automatically detect that the target application is running and it connects to the target app's Lua execution context.
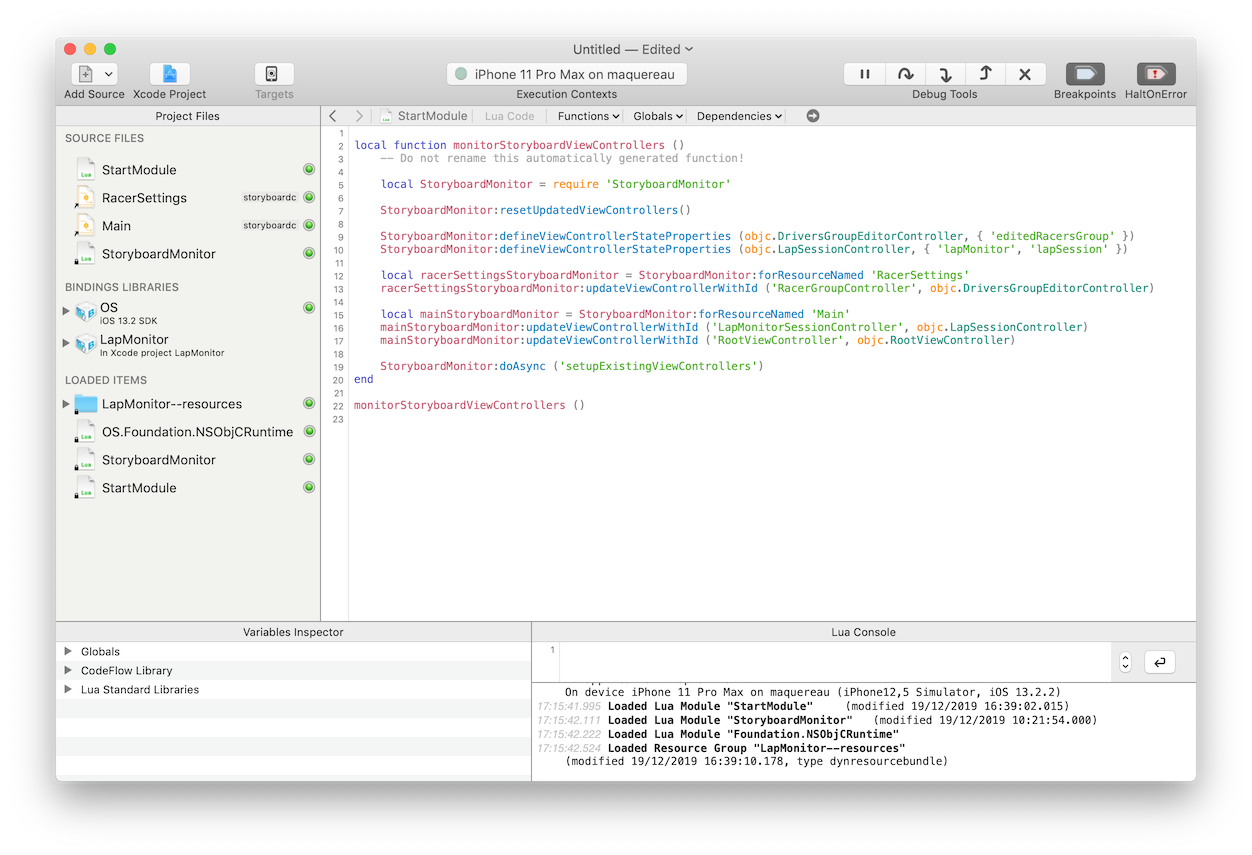
The target application is now ready to receive storyboard updates when edits are made in the Xcode project.
Updating the associated Xcode project configuration
At any time you can modify the set of dynamically-updated storyboards, ViewControllers, or ViewController state properties.
To do this, click on the Xcode Project button in the project window toolbar, or select Configure Association with Xcode Project… in the Program menu. When an associated Xcode project is already set, the configuration panel is directly displayed.

Once you have changed the dynamic storyboards configuration, click on the Done button. The configuration code in the start module is updated to reflect the new configuration:
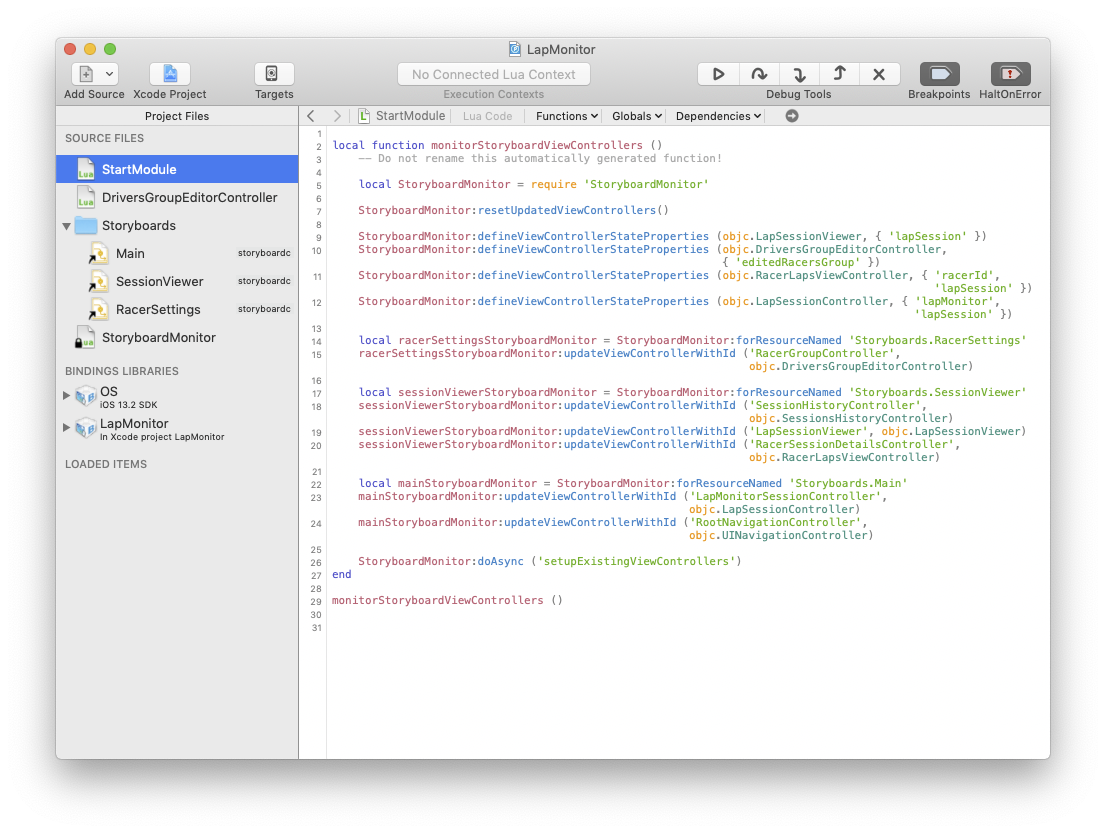
To make the configuration changes effective, you need to reload the start module in the target application or to restart the target application.
Post a Comment